Fits In Your Pocket
Free Pocket Bike Plans
Though it will never challenge a bigger mini bike, this home made pocket bike will buzz you around for next to nothing, and is a ton of fun.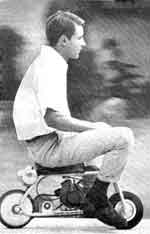 This model uses a 3/4 hp engine, and with the 20 to 1 gearing will probably hit around 11 MPH. That's more than plenty considering how small the rig is, and it will get you where you're going quick enough - around the neighborhood's back trails, to a fishing camp... Wherever! Modify it for street use (check local laws) and you'll have a sweet ride to get to class or the corner store.
 The beauty of the bike is the practicality of its size. It's small, but comfortable. Excellent for gas efficient travel to and from anywhere, and there's never a parking problem. Just chain it to a parking meter or telephone pole.
Keep in mind that this vehicle is designed basically for backyard (on your property) fun. From these plans there are no brakes, lights or horn. If you want to ride on the street legally, you need to check your local laws. Take the construction drawings to your local Motor Vehicle Bureau and check out state requirements for licensing. License plates and insurance are likely both are necessary if you would like to use this bike in traffic.
Pocket Sized Frame
How to Build a Pocket Bike Frame
The engine in the plans is a 3/4-hp Olson and Rice engine (now manufactured as O&R) mounted on an 1/8-in. sheet of aluminum. This is made for some agricultural operations.But any small engine will do.
The aluminum sheet in turn is attached to the frame with four 4-1/4" . U-bolts. (The bolts permit quick adjustment of the chain tension.) Depending upon the rider's bulk, the little bike may or may not take a steep hill. On occasion I've had to dismount and tote her up a hill under my arm.
To make it, you'll need at least 12 to 15 ft. of 5/8-in. thin wall tubing- for the frame. Build the frame in two sections and, for strength, join them with 5/8-in. steel pins inserted in the tubing at the joints. Where the pins cannot be used, wrap steel bands around the frame and braze for added strength. The brackets which support the rear wheel are bent into a U-shape, slipped into the frame and brazed.
The handlebars are two pieces of the thin wall tubing joined in the middle with two pieces of metal 1/8 x 1-1/2" x 5". spaced 3-1/4". apart. The latter are drilled out at center to receive the 5/8 x 4-1/2", bolt which serves as the turning spindle. To receive the front axle, the ends of the forks are flattened and drilled. To complete the front fork, bend the upper portions to form the handlebars. For leg clearance, bend forks slightly forward.

Fig,1

Fig. 2

Fig. 3

Fig. 4

Not Pocket Sized Power
Sprockets and Steering Design
I used a Fairbanks-Morse centrifugal clutch with an inside diameter of 1/2". Thus, I had to use a 5/8". adapter to install the clutch on the engine. The drive is provided by a No. 35 link chain. The engine sprocket has 11 teeth geared to the large sprocket on the 36- tooth jackshaft. Turning on the other end of the jackshaft is a 10-tooth sprocket geared to the 60-tooth sprocket on the rear wheel. This setup makes up a 20-to-l gear ratio.The baby-size wheels are four-inchers fitted with pneumatic tires and 1/2" bearings.
Frame members that hold the rear axle are bent into a U-shape, then brazed onto frame for added strength. (Right)
Happily, there is no hunting for materials. All parts for my bike were purchased locally from a lawnmower and mini bike shop.
(Left) The turning spindle assembly is a 5/8 x 4'/2-in. machine bolt through frame, on which two-piece handlebars turn. Unlike the off-road bike, this design is more permanent.

Fig.1

Fig. 2

Fig. 3
Putting it All Together
Final Design Schematic for Pocket Bike Plans
The seat on the bike shown was bought ready-made and fastened to the frame with four screws turned up through the metal bike-frame into its wooden base. The throttle control (and the cable) were fabricated from a bicycle hand-brake control.


I found this article from one interesting classic site
http://www.diygokarts.com/

No comments:
Post a Comment